Cavity drain membranes are widely used in basement waterproofing and damp-proofing systems to manage water ingress and protect internal finishes. Rather than attempting to block water, these systems create a controlled cavity that allows moisture to be collected and directed to a suitable drainage point.
One of the key advantages of cavity drain membrane systems is ease of installation. Whether used on walls, floors or vaulted ceilings, membranes can be fitted with minimal preparation and integrated into a complete waterproofing system. This guide outlines how common floor and wall membrane types are typically installed as part of a basement or damp-proofing solution.
Installing High-Capacity Cavity Drain Membranes
High-capacity cavity drain membranes are designed for use in areas subject to moderate to high levels of water ingress. They are commonly installed on basement floors, walls and vaulted ceilings where effective drainage is required.
- 20mm stud cavity drain membranes for increased drainage capacity in below-ground environments.
- Low-profile cavity drain membranes for areas with lighter water ingress.
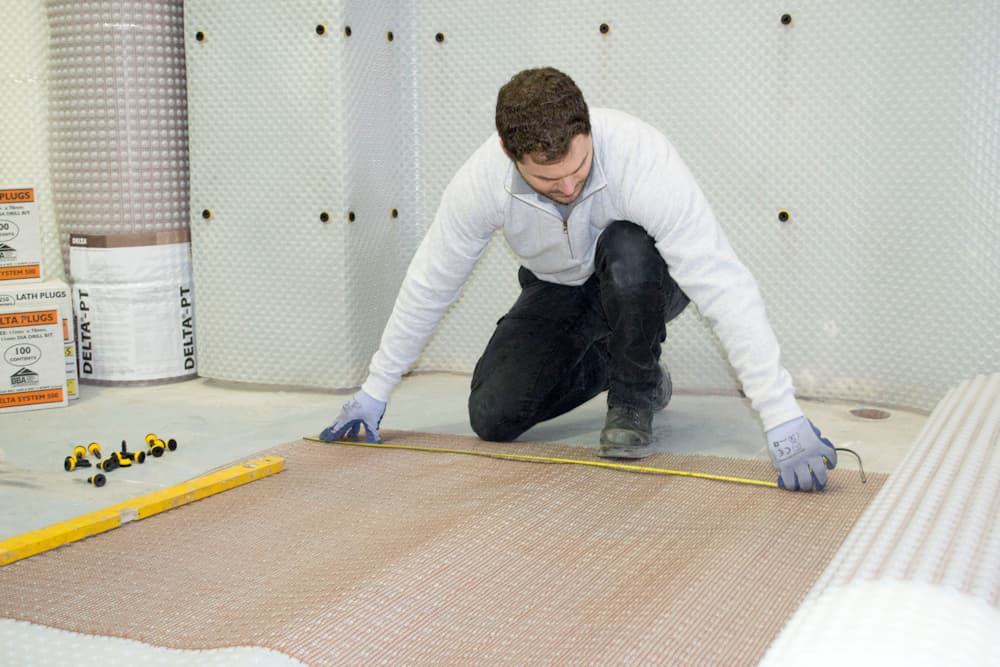
Installing a 20mm Stud Membrane as a Floor System
High-capacity stud membranes are suitable for basement floors and are often used alongside insulation and screed or floating floor constructions.
- Membrane + insulation + tongue and groove flooring
- Membrane + insulation + screed
- Membrane + insulation + underfloor heating + screed
Typical installation process:
- Carry out a flood test using a maintainable perimeter drainage channel set into a sacrificial screed.
- Ensure drainage channels are level or fall towards the outlet. Apply a suitable anti-lime or salt-inhibiting primer (such as this salt-inhibiting treatment) where required.
- Lay membrane sheets widthways, overlapping adjacent sheets by at least three studs.
- Allow for services by leaving a small clearance around pipes, sealing gaps with compatible sealing rope and tape.
- Seal wall-to-floor junctions using a compatible corner strip before installing finishes.
Installing High-Capacity Stud Membranes on Walls
Wall installations using deeper stud membranes are suited to environments with higher water penetration or flood risk.
- Prepare the wall so it is structurally sound, flat and free from loose material.
- Install membrane sheets with stud rows kept level.
- Detail around openings and obstructions using compatible corner strips.
- Mechanically fix through the studs at regular centres where required.
- Re-fit services once the membrane is fully secured.
- Connect wall membranes to perimeter drainage channels and floor membranes.
Installing Low-Profile Stud Membranes on Walls
Low-profile stud membranes are suitable for walls and vaulted ceilings where water ingress is limited and space is restricted.
- Prepare the substrate and repair any defects.
- Apply a primer where required to reduce lime or salt migration.
- Install membrane sheets vertically or horizontally with studs facing the substrate.
- Fix mechanically using suitable sealed fixings.
- Seal joints and overlaps with compatible waterproof tape.
- Ensure the base of the membrane connects into the drainage route.
Installing Mesh-Faced Wall Membranes
Mesh-faced cavity drain membranes are used on walls where a direct plaster or render finish is required. The bonded mesh provides a key for wet-applied finishes while maintaining a drainage cavity behind the membrane.
Typical build-ups include:
- Mesh-faced membrane + plasterboard + skim coat
- Mesh-faced membrane + render coat + skim coat
Wall Installation Method
- Ensure the wall is clean, sound and flat.
- Cut membrane sheets to height and install vertically.
- Overlap sheets at non-meshed edges and fix using sealed membrane plugs at close centres.
- Ensure the membrane is held tight to the wall with no movement.
- Seal joints with waterproof tape and apply fleece tape where render finishes are planned.
- All future services should be surface-mounted.
Installing Low-Profile Floor Membranes
Low-profile floor membranes are designed for damp-proofing existing concrete floors where head height is limited. They provide resistance to moisture and vapour and allow finishes to be applied immediately.
Typical installation steps:
- Measure and cut membrane sheets to size, laying them stud-side down.
- Apply sealing tape along the flanged edge.
- Overlap adjacent sheets onto the sealed flange.
- Install floor finishes directly over the membrane.
Choosing the Right Membrane System
Choosing the right membrane system depends on the level of water ingress, the structure itself and how the space will be used. In many basement projects, membranes are used alongside perimeter drainage channels and sump pump systems to manage groundwater effectively.
If you’re unsure which membrane or system is best for your project, our in-house technical team is here to help. We offer free, practical advice to help you make the right choice and avoid costly mistakes. Call us on 0117 332 4747 to discuss your project.
Explore our full range of basement waterproofing membranes for walls and floors.